

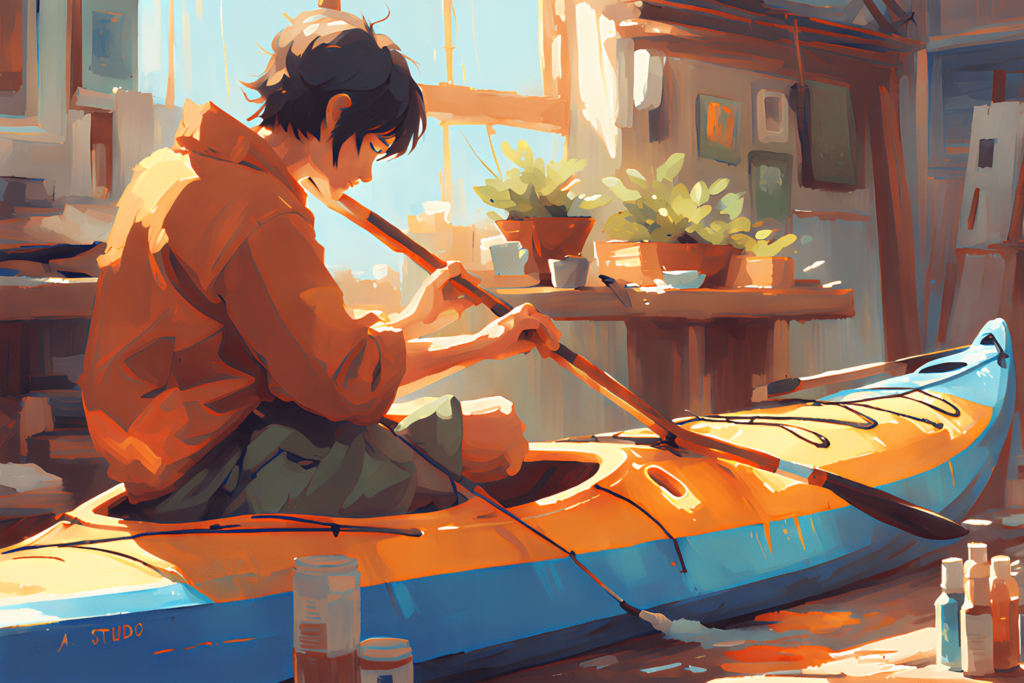
Overview of Kayak Painting Tips
Painting your kayak can be a fun and rewarding project that allows you to personalize your watercraft and make it stand out on the water. Whether you want to add a splash of color or create a unique design, painting your kayak can give it a fresh new look. In addition to aesthetics, there are several benefits to painting your kayak. Firstly, it can provide an extra layer of protection against the elements, such as UV rays and saltwater corrosion. Secondly, it can help to camouflage your kayak, making it less visible to fish and wildlife while you’re out on the water. Lastly, painting your kayak can be a great way to express your creativity and showcase your personality.
Before diving into the world of kayak painting, there are a few things you should consider. Firstly, check with the manufacturer of your kayak to ensure that painting it won’t void any warranties. Some manufacturers may have specific guidelines or recommendations for painting their kayaks. Secondly, think about the type of paint you want to use and how it will adhere to the material of your kayak. Different types of paint may work better on certain materials, so do some research to find the best option for your kayak. Lastly, consider the time and effort required for the project. Painting a kayak is not a quick task and will require patience and attention to detail.
Key Takeaways
- Choose the right paint for your kayak based on its material and intended use.
- Properly prepare your kayak by cleaning and sanding it before painting.
- Use masking tape to create clean lines and avoid getting paint where you don’t want it.
- Apply primer before painting to ensure a smooth and even finish.
- Add a clear coat for added protection and to make your design pop.
Choosing the Right Paint for Your Kayak
When it comes to choosing paint for your kayak, there are several options available. The most common types of paint used for kayaks include marine-grade enamel paint, polyurethane paint, and epoxy paint. Marine-grade enamel paint is a popular choice due to its durability and resistance to fading and chipping. Polyurethane paint is another good option as it provides excellent UV protection and is resistant to abrasions and chemicals. Epoxy paint is known for its high-gloss finish and exceptional durability.
When choosing paint for your kayak, there are a few factors to consider. Firstly, consider the color and finish you want to achieve. Some paints come in a wide range of colors, while others may require mixing to achieve your desired shade. Additionally, consider the drying time and curing process of the paint. Some paints may require multiple coats and longer drying times, so be sure to plan accordingly. Lastly, consider the environmental impact of the paint you choose. Look for paints that are low in volatile organic compounds (VOCs) to minimize harm to the environment.
Recommended brands of paint for kayaks include Rust-Oleum Marine Coatings, Interlux Brightside Polyurethane, and TotalBoat Wet Edge Topside Paint. These brands are known for their quality and durability, making them popular choices among kayak enthusiasts.
Preparing Your Kayak for Painting
Before you can start painting your kayak, it’s important to properly prepare the surface. This involves cleaning your kayak, removing any old paint or decals, repairing any damages, and sanding the surface to create a smooth base for painting.
Start by thoroughly cleaning your kayak using a mild detergent and water. Remove any dirt, grime, or salt residue from the surface. Pay special attention to areas that may be prone to buildup, such as the cockpit and storage compartments. Once your kayak is clean, allow it to dry completely before moving on to the next step.
If your kayak has any old paint or decals that you want to remove, there are several methods you can use. One option is to use a heat gun or hairdryer to soften the paint or decals, making them easier to scrape off with a plastic scraper or putty knife. Another option is to use a chemical paint stripper specifically designed for removing paint from plastic surfaces. Be sure to follow the manufacturer’s instructions when using any chemical products.
After removing any old paint or decals, inspect your kayak for any damages that need to be repaired. This may include cracks, dents, or scratches. Use a marine-grade epoxy or plastic repair kit to fill in any imperfections and allow it to dry according to the manufacturer’s instructions.
Once your kayak is clean and repaired, it’s time to sand the surface. Sanding helps to create a smooth and even base for the paint to adhere to. Start by using a coarse-grit sandpaper (around 80-120 grit) to remove any rough areas or imperfections. Then, gradually move to finer-grit sandpaper (around 220-400 grit) to smooth out the surface. Be sure to sand in a consistent direction and avoid applying too much pressure, as this can damage the material of your kayak.
Sanding Techniques for a Smooth Finish
| Technique | Description | Advantages | Disadvantages |
| Hand Sanding | Sanding by hand using sandpaper or sanding blocks. | Low cost, good for small areas, allows for more control. | Time-consuming, can be tiring, may not be suitable for large areas. |
| Power Sanding | Sanding using a power tool such as an orbital sander or belt sander. | Fast, efficient, good for large areas, can be less tiring. | Higher cost for power tools, may require more skill to use, can be noisy and messy. |
| Wet Sanding | Sanding using water to lubricate the surface and prevent dust. | Produces a smoother finish, reduces dust, can be used on delicate surfaces. | Requires more time and effort, can be messy, may require special equipment. |
| Buffing | Using a buffing wheel or pad to polish the surface after sanding. | Produces a high-gloss finish, can remove scratches and imperfections. | Requires special equipment, can be time-consuming, may not be suitable for all surfaces. |
When it comes to sanding your kayak, having the right tools and techniques can make all the difference in achieving a smooth finish. The tools you’ll need for sanding include sandpaper in various grits, a sanding block or sponge, and a soft cloth or tack cloth for removing dust.
Start by using a coarse-grit sandpaper (around 80-120 grit) to remove any rough areas or imperfections on your kayak’s surface. This may include scratches, dents, or old paint that couldn’t be completely removed. Use a sanding block or sponge to ensure even pressure and consistent results. Sand in a circular motion or back-and-forth motion, depending on the shape of the area you’re working on.
Once you’ve smoothed out any rough areas, switch to a finer-grit sandpaper (around 220-400 grit) to further refine the surface of your kayak. This will help to create a smooth base for the paint to adhere to. Again, use a sanding block or sponge for even pressure and consistent results. Sand in the same direction as the grain of the material, if applicable, to avoid creating visible scratches.
After sanding, use a soft cloth or tack cloth to remove any dust or debris from the surface of your kayak. This is important to ensure that the paint adheres properly and to prevent any imperfections in the final finish. Be thorough in removing all dust particles, as even small specks can affect the smoothness of the painted surface.
Masking and Taping for Clean Lines
Masking and taping are essential steps in achieving clean lines and crisp edges when painting your kayak. The tools you’ll need for masking and taping include painter’s tape, a utility knife or scissors, and a plastic sheet or drop cloth to protect areas you don’t want to paint.
Start by identifying the areas of your kayak that you want to protect from paint. This may include hatches, handles, logos, or any other parts that you want to keep their original color or finish. Use painter’s tape to cover these areas, ensuring that it adheres firmly and creates a tight seal. Cut the tape with a utility knife or scissors for precise edges and corners.
When applying painter’s tape, it’s important to take your time and be meticulous. Ensure that the tape is straight and aligned with the edges you want to protect. Press down firmly on the tape to create a tight seal and prevent any paint from bleeding underneath. If necessary, use additional strips of tape to cover larger areas or create complex shapes.
In addition to protecting specific areas, you may also want to use a plastic sheet or drop cloth to cover the entire kayak or certain sections. This will help to prevent overspray and accidental paint splatters. Secure the plastic sheet or drop cloth with painter’s tape, ensuring that it covers all exposed surfaces.
Applying Primer to Your Kayak
Applying primer is an important step in the painting process as it helps to create a smooth and even base for the paint to adhere to. Primer also enhances the durability and longevity of the paint job. There are several types of primer available for kayaks, including self-etching primer, epoxy primer, and high-build primer.
Self-etching primer is specifically designed for use on bare metal or fiberglass surfaces. It chemically bonds to the surface, providing excellent adhesion for the paint. Epoxy primer is a good option for kayaks that have been repaired or have a rough surface. It fills in imperfections and creates a strong bond with the paint. High-build primer is ideal for creating a smooth and level surface, especially if you have sanded down to the bare material of your kayak.
Before applying primer, ensure that your kayak is clean and free of any dust or debris. Use a soft cloth or tack cloth to remove any particles that may affect the adhesion of the primer. Shake the primer can thoroughly to mix the contents and follow the manufacturer’s instructions for application.
When applying primer, start with a thin and even coat. Hold the can about 8-12 inches away from the surface of your kayak and spray in a sweeping motion. Be sure to overlap each pass slightly to ensure even coverage. Allow the first coat to dry according to the manufacturer’s instructions before applying additional coats. Depending on the type of primer you’re using, you may need to apply multiple coats to achieve the desired level of coverage and smoothness.
Tips for Applying Paint to Your Kayak
When it comes to applying paint to your kayak, there are several tips and techniques that can help you achieve a professional-looking finish. The tools you’ll need for painting include paint brushes or rollers, a paint tray or bucket, and a stir stick for mixing the paint.
Before starting, ensure that your kayak is clean and free of any dust or debris. Use a soft cloth or tack cloth to remove any particles that may affect the smoothness of the paint job. If you’re using multiple colors or creating a design, plan out your painting process in advance to ensure that you achieve the desired result.
When using paint brushes or rollers, choose ones that are specifically designed for the type of paint you’re using. Synthetic brushes or foam rollers are often recommended for water-based paints, while natural bristle brushes are better suited for oil-based paints. Dip the brush or roller into the paint tray or bucket, ensuring that it’s evenly coated but not overloaded with paint.
When applying paint, start with a thin and even coat. Use long, smooth strokes to cover the surface of your kayak, working in one direction to avoid visible brush or roller marks. Be sure to overlap each stroke slightly to ensure even coverage. If you’re using multiple colors, allow each coat to dry before applying the next one to prevent smudging or bleeding.
If you’re painting a large area, such as the hull of your kayak, consider using a roller for faster and more efficient coverage. Rollers can help to create a smooth and even finish, especially on flat or slightly curved surfaces. Use a roller tray or bucket to evenly distribute the paint and roll it onto the surface in long, even strokes.
Creating Designs and Patterns on Your Kayak
One of the most exciting aspects of painting your kayak is the opportunity to create unique designs and patterns. Whether you want to showcase your favorite sports team, display intricate artwork, or simply add some personal flair, there are several techniques you can use to achieve your desired look.
Before starting, it’s important to plan out your design in advance. Consider the size and shape of your kayak, as well as any specific areas you want to highlight or cover. You can sketch out your design on paper or use computer software to visualize how it will look on your kayak.
When it comes to creating designs, there are several tools you can use. Paint brushes of various sizes are great for adding details and fine lines. Stencils can help you achieve precise shapes or patterns. Spray paint or airbrushing can create smooth gradients or fades. And masking tape can be used to create geometric shapes or block off certain areas.
To create a design on your kayak, start by applying a base coat of paint in the desired color. This will serve as the background for your design and provide a solid foundation. Once the base coat is dry, you can start adding your design using the tools and techniques mentioned above. Take your time and be patient, as creating intricate designs may require multiple layers and careful attention to detail.
If you’re not confident in your artistic abilities, there are also pre-made decals and stickers available that can be applied to your kayak. These decals come in a wide range of designs and sizes, allowing you to easily customize your kayak without the need for painting skills.
Adding Clear Coat for Protection
After you’ve finished painting your kayak, it’s important to add a clear coat for added protection and durability. Clear coat helps to seal the paint and provide an extra layer of defense against UV rays, saltwater corrosion, and general wear and tear. It also enhances the glossiness and depth of the paint job, giving it a professional-looking finish.
There are several types of clear coat available for kayaks, including polyurethane clear coat, epoxy clear coat, and acrylic clear coat. Polyurethane clear coat is a popular choice due to its durability and resistance to UV rays and chemicals. Epoxy clear coat is known for its high-gloss finish and exceptional durability. Acrylic clear coat is a good option if you’re looking for a more environmentally friendly choice, as it typically has lower VOC levels.
Before applying clear coat, ensure that your painted kayak is clean and free of any dust or debris. Use a soft cloth or tack cloth to remove any particles that may affect the smoothness of the clear coat. Shake the clear coat can thoroughly to mix the contents and follow the manufacturer’s instructions for application.
When applying clear coat, start with a thin and even coat. Hold the can about 8-12 inches away from the surface of your kayak and spray in a sweeping motion. Be sure to overlap each pass slightly to ensure even coverage. Allow the first coat to dry according to the manufacturer’s instructions before applying additional coats. Depending on the type of clear coat you’re using, you may need to apply multiple coats to achieve the desired level of protection and glossiness.
Maintaining Your Painted Kayak
Once you’ve completed your painted kayak, it’s important to properly maintain it to ensure its longevity and appearance. Here are some tips for maintaining your painted kayak:
1. Regularly clean your kayak: After each use, rinse your kayak with fresh water to remove any salt or dirt buildup. Use a mild detergent and water to clean the surface, being careful not to scrub too harshly or use abrasive materials that could damage the paint.
2. Avoid dragging or scraping: When launching or landing your kayak, be mindful of any rough surfaces or sharp objects that could scratch or scrape the paint. Lift and carry your kayak whenever possible to prevent unnecessary damage.
3. Touch up any damages: Over time, your painted kayak may develop small scratches or chips. To keep it looking its best , touch up any damages with a matching paint color. This will not only improve the appearance of your kayak but also help protect it from further damage. Make sure to clean and dry the area before applying the touch-up paint, and allow it to fully dry before using your kayak again. Regular maintenance like this will ensure that your painted kayak stays in great condition for years to come.
Download over 500 Boat Plans. Click on the link below.
-->Click Here<--
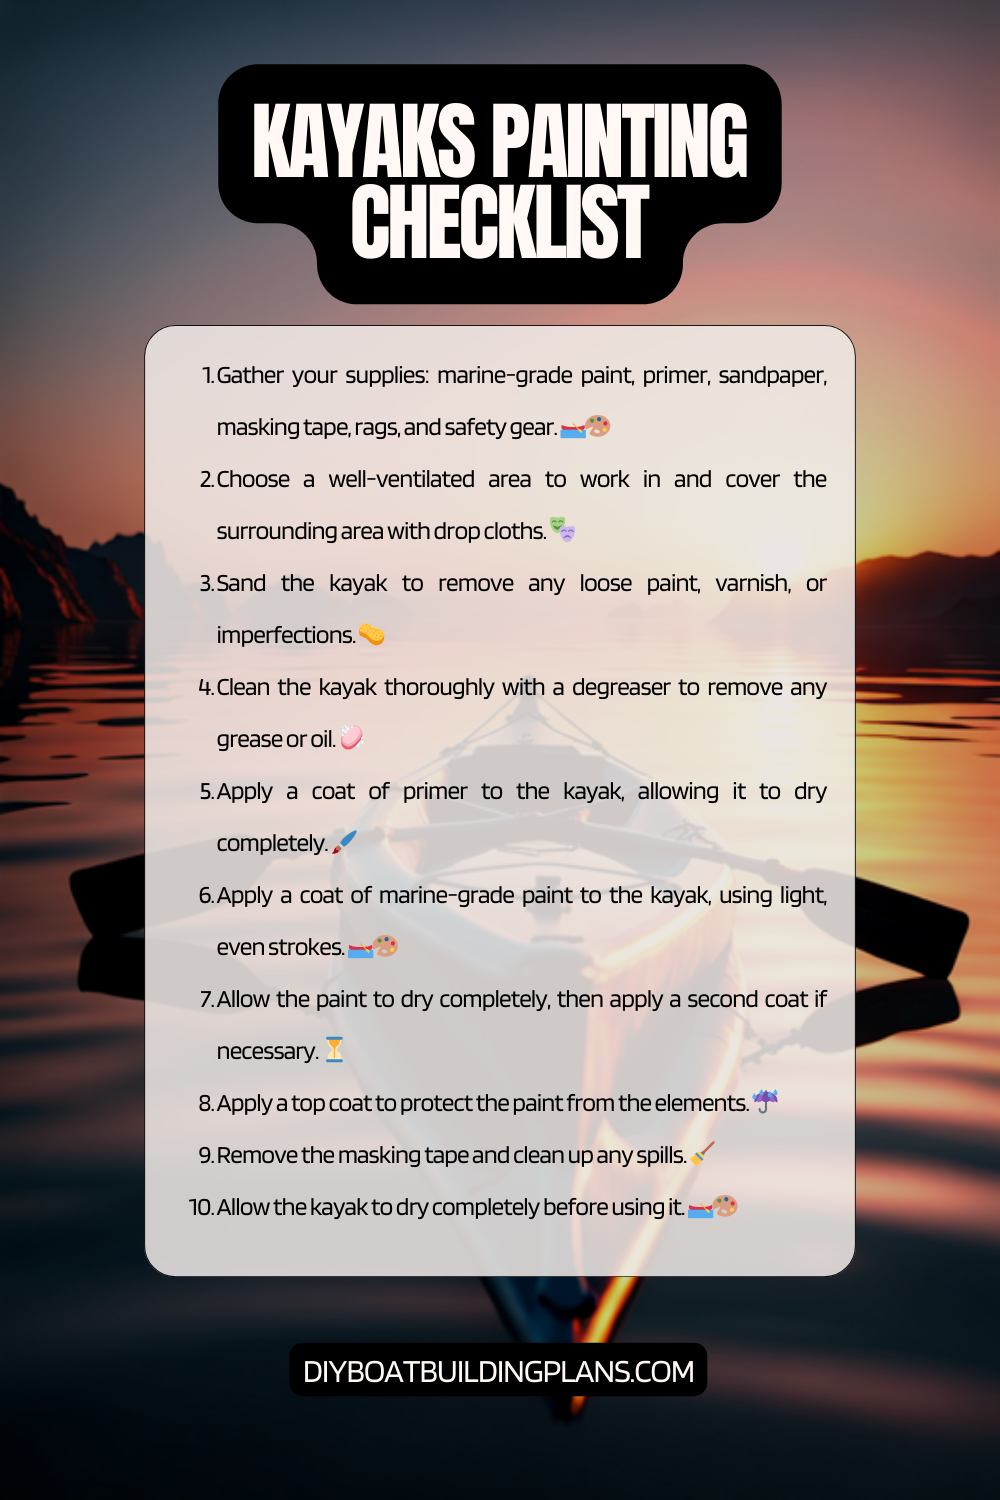
Kayak Painting Checklist
Conclusion – Kayak Painting Tips
In conclusion, painting your kayak can be a rewarding and creative endeavor that not only enhances its appearance but also extends its lifespan by protecting it from the elements. By following the steps outlined in this article and considering factors like the type of material, the condition of your kayak’s surface, and your desired results, you can achieve a professional-looking paint job.
Remember to choose the appropriate type of paint for your kayak’s material, prepare your kayak surface diligently, and apply thin, even coats for the best results. Additionally, using a clear coat can add an extra layer of protection and aesthetic appeal.
Whether you’re looking to personalize your kayak, refresh its appearance, or simply provide essential protection, the process of kayak painting can be a fun and fulfilling project. With the right approach and some patience, your kayak will not only look great but also withstand the rigors of outdoor adventures. Happy painting and happy kayaking!
FAQs – Kayak Painting Tips
What is kayak painting?
Kayak painting is the process of applying paint or other coatings to the surface of a kayak to enhance its appearance or protect it from damage.
Why should I paint my kayak?
Painting your kayak can help protect it from the elements, prevent fading, and make it more visible on the water. It can also be a fun way to personalize your kayak and make it stand out.
What kind of paint should I use?
It is recommended to use marine-grade paint or other coatings specifically designed for use on kayaks. These types of paints are more durable and resistant to water and UV rays.
How do I prepare my kayak for painting?
Before painting your kayak, it is important to clean and sand the surface to ensure proper adhesion of the paint. You should also remove any stickers or decals and mask off any areas you do not want to paint.
What tools do I need to paint my kayak?
You will need a variety of tools, including paint brushes, rollers, and spray guns, depending on the type of paint you are using. You may also need sandpaper, masking tape, and a respirator mask.
How many coats of paint should I apply?
It is recommended to apply at least two coats of paint to ensure even coverage and durability. However, the number of coats may vary depending on the type of paint and the desired finish.
How long does it take for the paint to dry?
The drying time for kayak paint can vary depending on the type of paint and the weather conditions. It is important to follow the manufacturer’s instructions for drying time and to avoid using the kayak until the paint is fully cured.