

Ever thought about making your own watercraft with simple tools and a lot of passion? Building a DIY kayak might seem like a huge task. But, what if it’s actually easier than you think?
Making a homemade kayak is a thrilling adventure that mixes creativity, skill, and adventure. It doesn’t matter if you love woodworking or kayaking. Creating your own boat lets you design something that fits your needs perfectly.
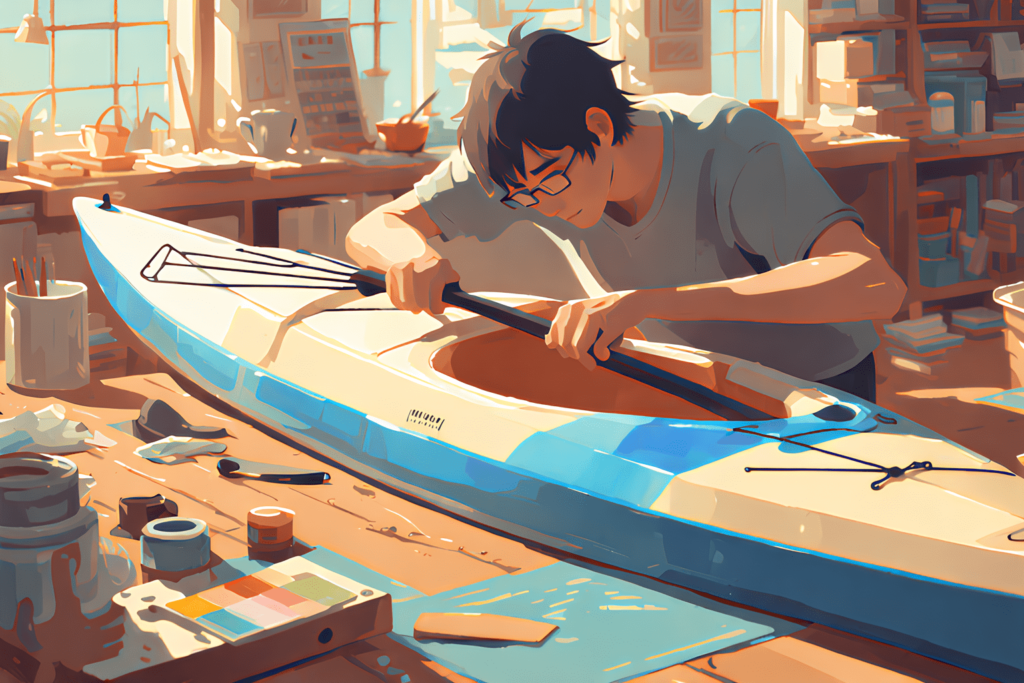
DIY kayak building is more than just making a boat. It’s about creating an unforgettable experience. You can use various techniques to turn simple materials into a remarkable personal watercraft. Options range from skin-on-frame designs to woodstrip-epoxy methods, and more.
Building a kayak takes time, from 45 to 200 hours, depending on the method. It’s a rewarding project that combines craftsmanship with a love for the outdoors.
Key Takeaways – How To Build a Kayak
- DIY kayak building is achievable for motivated enthusiasts
- Multiple construction techniques offer flexibility
- Homemade kayaks can be lightweight and personalized
- Building time varies from 45 to 200 hours
- Customization allows for unique design preferences
Understanding Kayak Designs
Kayak construction is a mix of woodworking and boat building. The right kayak design can turn a tough build into a great paddling experience.
- Skin on Frame (SOF) Kayaks: These are light and affordable, costing about $300
- Stitch and Glue Kayaks: Great for beginners and those with some experience
- Strip-Built Kayaks: Need advanced woodworking skills
- Plywood Designs: Fast to build and easy on the wallet
Types of Kayaks to Consider
There are many kayak styles, each with its own benefits. Brands like Chesapeake Light Craft and Pygmy Boats offer great kits for fans.
“The right kayak design is a personal journey of craftsmanship and passion.”
Choosing the Right Design for You
Think about these key points when picking a kayak design:
- Your woodworking skill level
- How much time you have to build it
- Where you plan to paddle
- Your budget for materials
YouTube tutorials and books like “Building the Greenland Kayak” can help a lot with your build.
Unlock the secrets to building your dream boat with MyBoatPlans! With detailed plans for over 518 boats and expert video tutorials, you’ll have everything you need to create your perfect vessel. Click here to begin your journey!
Essential Tools and Materials Needed
Making your own kayak needs careful planning and the right gear. Whether you love boating or water sports, knowing what tools and materials to use is key. It makes your project a success.
Building a kayak is an exciting adventure. It requires specific tools and top-notch materials. Choosing the right ones can turn a good project into a great one.
Basic Tools for Kayak Construction
Your toolkit for building a kayak should have precise tools and safety gear. Here’s a list of must-haves:
- Safety glasses and dust mask
- Tape measure and carpenter’s pencil
- Power drill and various saw types (jigsaw, circular saw)
- Hand plane and flush cut pliers
- Paint roller and cutting board
Recommended Materials for Durability
Choosing the right materials is key for a kayak that lasts. It should handle water well and last a long time.
| Material Category | Recommended Items | Estimated Cost |
|---|---|---|
| Foam Sheets | XPS (Extruded Polystyrene) – 2 sheets | $50-$75 |
| Adhesives | Gorilla Glue, Titebond II | $20-$30 |
| Covering | Canvas, Old Bedsheets | $25-$45 |
“The right tools transform a challenging project into an enjoyable crafting experience.” – Experienced Kayak Builder
When starting your kayak project, remember quality gear matters. It makes your kayak perform better and last longer.
Step-by-Step Guide to Building a Kayak
Starting a DIY kayak project needs careful planning and precision. It’s a rewarding journey, whether you’re into woodworking or new to boat building. The process involves several stages that require patience and detail.
Understanding the time needed is key. Most kayak projects take 80-100 hours. Aim to work on it 10 hours a week to keep the project moving and stay motivated.
Preparing Your Workspace
A tidy workspace is essential for building a kayak. Here are some important setup tips:
- Use sawhorses and plywood sheets for a good work surface
- Make sure you have enough light and air
- Get a quality respirator for safe epoxy work
- Have various clamps ready
Crafting the Kayak Frame
The frame is the heart of your kayak. There are different ways to build it, each with its own benefits:
- Strip-built technique: Attach cedar strips carefully
- Stitch and glue method: Connect plywood panels with precision
- Hybrid approaches combining multiple techniques
| Construction Method | Complexity | Time Required |
|---|---|---|
| Strip-built | Moderate | 80-100 hours |
| Stitch and Glue | Beginner-friendly | 60-90 hours |
Skinning Your Kayak
The last step is adding a protective skin. You can use:
- Fiberglass for strip-built kayaks
- Specialized fabric for skin-on-frame designs
- UV stable epoxy for clear, durable finishes
“Building your own kayak is not just about creating a boat, but crafting a personal connection with the water.”
Safety Considerations when Building
Building a DIY kayak needs careful safety attention. Outdoor adventure fans know that safety is key during boat building. This helps avoid accidents and makes the project a success.
Start with a safe workspace. A clean and well-equipped area lowers risks during kayak making.
Best Practices for Safe Construction
- Ensure adequate ventilation when working with adhesives and resins
- Keep your workspace clean and well-lit
- Maintain sharp tools in good condition
- Use proper lifting techniques when handling large materials
- Work at a comfortable pace to avoid fatigue
“Safety doesn’t happen by accident. It’s a deliberate choice in every step of your kayak-building journey.” – Experienced Kayak Builder
Essential Safety Gear to Use
Protecting yourself is key when making a DIY kayak. The right safety gear can stop injuries during your project.
- Safety glasses to protect eyes from debris
- Dust masks for respiratory protection
- Heavy-duty work gloves
- Ear protection when using power tools
- Non-slip work shoes
Remember, professional kayak builders like Nick Schade stress safety in wooden boat making. By following these tips, you’ll make a beautiful kayak. And you’ll stay safe during the fun DIY boat building process.
Finishing Touches and Customization
Turning your handcrafted kayak into top-notch water sports gear needs focus on finishing and customization. The right methods can make your outdoor gear go from good to great.
Painting and Sealing Your Kayak
Choosing the right finish is key to protecting your kayak. Experts say to use marine-grade finishes for durability and to keep water out.
- Marine-grade enamel for long-lasting protection
- Titanium dioxide pigment for UV resistance
- Pettit EZPoxy one-part polyurethane topside enamel
“The finish is not just about looks – it’s about preserving your kayak’s integrity and performance.” – Kayak Crafting Expert
Custom Accessories to Enhance Performance
Adding custom accessories to your kayak can really boost your experience. Think about these upgrades:
| Accessory | Performance Benefit |
|---|---|
| Deck Lines | Improved Safety and Grip |
| Adjustable Foot Pegs | Better Paddling Ergonomics |
| Custom Seat | Enhanced Comfort |
| Rod Holders | Fishing Functionality |
For a pro finish, sand between coats and use marine-grade sealant on all joints and seams. This keeps your kayak dry and ready for your next adventure.
Tips for Successful Kayak Construction
Building a DIY kayak needs precision, patience, and planning. Homemade kayaks are rewarding projects that require attention to detail. Whether you’re new to boat building or have experience, knowing key strategies can help your project go smoothly.
Professional kayak builders suggest several important approaches for a successful build:
- Prepare your workspace well before starting
- Organize tools and materials ahead of time
- Double-check measurements many times
- Use high-quality materials and the right tools
Common Mistakes to Avoid
When making homemade kayaks, some mistakes can ruin your project. Be careful of these common errors:
Download over 500 Boat Plans. Click on the link below.
-->Click Here<--
- Rushing through preparation stages
- Skipping critical measurement checks
- Using the wrong or low-quality materials
- Not organizing your workspace properly
“90% of our kayak kits go to first-time boat builders,” says Michael Vermouth from Newfound Woodworks. This shows how DIY kayak projects are accessible.
Techniques for a Smooth Build
To get better at boat building, try these expert tips:
- Use 80-grit sandpaper for initial surface prep
- Employ a CAD system for precise shape patterns
- Apply regular epoxy resin with careful coating techniques
- Use filament tape for temporary clamping during epoxy setting
By following these tips, you’ll have a better chance of making a high-quality, functional DIY kayak. You’ll be proud of your work.
Testing Your Kayak on Water
After building your DIY kayak, it’s time for its first paddle. This moment is filled with excitement and a bit of nervousness. You want to make sure your kayak is safe and performs well.
Before you paddle for the first time, there are important steps to take:
- Inspect all kayak seams and joints thoroughly
- Verify waterproof sealant integrity
- Check structural stability
- Prepare essential safety equipment
Pre-Launch Safety Checklist
Before you hit the water, make sure you have everything you need. Pack these important items:
- Life jacket (always wear)
- Whistle for emergency signaling
- First aid kit
- Waterproof communication device
Smart Testing Strategies
Choose a calm, shallow spot for your first paddle. Calm, shallow waters are perfect for beginners. It’s also a good idea to have a friend who knows how to kayak. They can help you and keep you safe.
“The first paddle is about understanding your kayak’s personality and your connection with it.” – Experienced Kayaker
When you’re testing your kayak, pay attention to how it handles. Look at:
- Tracking precision
- Maneuverability
- Initial stability
- Paddling efficiency
Your homemade kayak shows off your skills. Be patient and careful during the first test. Safety should always be your top priority.
Maintenance and Care of Your DIY Kayak
Keeping your kayak in good shape is key to a great kayaking experience. Regular care helps your kayak last longer and stay safe. This way, your boating hobby stays fun for years.
After every trip, clean your kayak well. The Brooklyn Kayak Company says to rinse it with fresh water, mainly after saltwater trips. This stops salt and dirt from harming your kayak’s surface.
Essential Maintenance Practices
- Clean your kayak with mild soap and water after each use
- Inspect the hull for any damage or wear
- Check all accessories and rigging components
- Store in a cool, dry place away from direct sunlight
Seasonal Preparation and Storage
Proper storage is key to maintaining your kayaking equipment. Before the off-season, take off all removable parts and clean the kayak inside and out.
| Maintenance Area | Action Items |
|---|---|
| Surface Protection | Apply UV protectant for plastic kayaks |
| Storage | Use breathable covers, avoid direct ground contact |
| Inspection | Check for dents, leaks, and structural integrity |
Repairs and Upgrades
“A well-maintained kayak is a reliable companion for your outdoor adventures.” – Kayaking Enthuasiast
Fixing small damages quickly stops bigger problems. For small issues, use materials like carbon fiber cloth or fiberglass. Think about upgrading your kayak with better seats or more storage.
Joining a Kayaking Community
Building your own kayak opens up a world of outdoor adventure. Connecting with other kayaking enthusiasts can turn your solo project into a community journey. Local groups like NESurfkayakers and ConnYak show how kayak lovers can come together, with some clubs having over 400 members nationwide.
Exploring kayaking communities offers many benefits for DIY kayakers. Online platforms like Yahoo Groups are great for networking. The Georgia Canoeing Association is a good example of a structured kayaking network. Membership fees are usually around $15 a year, covering website costs, pool sessions, and educational demos.
Resources for DIY kayaking communities go beyond local clubs. Websites like flowpaddlers.org and geneseewaterways.org offer guidance and collaboration. Regional improvements, like new whitewater parks, can boost local kayaking scenes. Hosting informal meetings and creating welcoming environments can increase interest in kayaking equipment and club engagement.
Benefits of Connecting with Other Enthuasiasts
Connecting with fellow kayak builders offers valuable learning experiences. Sharing construction techniques and discussing innovations can improve your skills. Being close to diverse water environments, like within a 4-hour drive of whitewater spots, makes community connections exciting and practical.
FAQ – How To Build a Kayak
How long does it take to build a kayak at home?
The time it takes depends on the design. A Sawfish kayak can be done in a weekend. Strip-built kayaks might take 2-4 weeks for beginners. The 24 Hour Kayak can be built quickly with effort.
What is the most beginner-friendly kayak design?
The Sawfish kayak is great for beginners. It uses XPS foam and needs little woodworking skill. It’s also lightweight, unsinkable, and costs $125-$150.
How much does it cost to build a DIY kayak?
Costs differ by design. A Sawfish kayak costs $125-$150. Strip-built kayaks are $300-$500. Plywood designs like the 24 Hour Kayak cost $200-$350.
Do I need professional woodworking skills to build a kayak?
No, you don’t need to be a pro. The Sawfish is perfect for beginners. Strip-built kayaks from Bear Mountain Boats need more skill and patience.
What safety equipment do I need when building a kayak?
You’ll need safety glasses, dust masks, gloves, and good ventilation. Work in a well-lit, organized space. Follow tool safety rules.
Can I customize my homemade kayak?
Yes! You can add deck lines, bungee cords, rod holders, seats, and foot pegs. Many builders like to make their kayaks their own.
How do I maintain my DIY kayak?
Rinse with fresh water after use, and store in a cool, dry place. Inspect for damage, touch up paint, and fix repairs quickly.
Where can I find support and resources for kayak building?
Look for online forums, social media groups, and local clubs. Bear Mountain Boats and other websites offer advice and support for DIY builders.